Search This Blog

Friday, 14 December 2018

Recreating the My Bookings and Tasks view using Calendar Controls in the Unified Interface

One useful piece of functionality in Dynamics 365 for Project Service Automation (PSA) is the My Bookings and Tasks view. This view gives resources a quick and easy way to view information that is only related to them, rather than having to go through the clicks of navigating to the schedule board and searching for themselves. 


Currently in version 3.2 of PSA, this view hasn't been moved over from the legacy client. This makes it a great example as to how we can use custom controls in the unified interface to replicate this functionality through your own customisation. 


Using the Calendar Control

There are various custom controls now available to us in D365, and one of these is the calendar control. Providing your record is time-based, the calendar control allows you to depict a view as a calendar. So in this example, your view will be 'My Project Tasks' and 'My Bookable Resource Bookings', giving the resource a holistic view of everything they have planned for the month. 


The first step is to ensure you have a view with the correct filter criteria, otherwise it will pull incorrect data. To do this, I am going to take a copy of the out of the box 'Active Bookable Resource Bookings' view, and change the filter criteria.


The key thing I need to specify is that the booking relates to my bookable resource and the status does not equal cancelled. Therefore I need to set the criteria as seen below whereby the user linked to my resource equals the current user and the status is not cancelled.

Now that I have my criteria specified, I can change this view to show as a calendar by adding the control. You can do this by navigating to your view and clicking Custom Controls.


Click Add Control.


Select the Calendar Control and click Add.


Now you've added the control, you need to specify which field values will be used to display records on the calendar i.e. Start Time should be taken from the Start Time field on the Bookable Resource Booking. Do this by selecting the icon as per below.


Then choose the values you want to map. 


Fill in the remaining values that need mapping and click OK. 


Also ensure that the calendar control is the one that is set to default.


Now I've set up my calendar control, I need to add this to the unified interface. I need to start by adding the Bookable Resource Booking entity and Project Task entity to the Project Resource Hub sitemap (which is a unified interface app). 


I also made sure only the My Active Bookings view and My Project Tasks would be the only views available by amending the Project Resource Hub app designer.


After saving and publishing, I navigated to the Project Resource Hub and there you have it. Both entities now only show the relevant views and default to the calendar, rather than the standard read only grid view.

Summary

This is just one example of how the calendar control could be used, as you can see it allows us to improve the user's experience and extend functionality, adding a huge amount of value to what we can do with standard customisation in D365. This example is a fairly basic and relatively quick piece of customisation, yet it replicates a considerable piece of custom development in earlier versions of PSA. 

Monday, 5 November 2018

Adding Icons for the Unified Interface

With the introduction of the Unified Interface in Dynamics 365, the way in which we customise areas of Customer Engagement are subject to change and one of these is updating icons for entities. It's always good admin to add an icon for any custom entity to enhance the user's experience. The Unified Interface uses Scalable Vector Graphics (SVG) so there is no longer the need to create web resources for different sized icons and as you can see from the below, they're pretty easy on the eye.


Instructions

First things first, you'll need to save the icon you want to use as an SVG. In general, I always use Metro Studio (https://www.syncfusion.com/downloads/metrostudio) to get my icons. When I've found the icon I need, best practice is to format it 32px for both dimensions and 0px Padding. Once you've done that, you need to export it.


Click Export and change the Save as type to SVG.


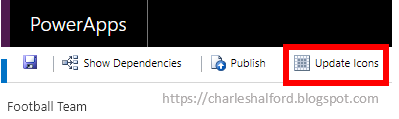
Now you have your icon, navigate back into Dynamics 365 and open up your entity within your solution. Click Update Icons as you would to update an icon in the old interface.

The first thing you'll notice is a new Unified Interface tab. Open this tab and then add your new icon as a web resource.
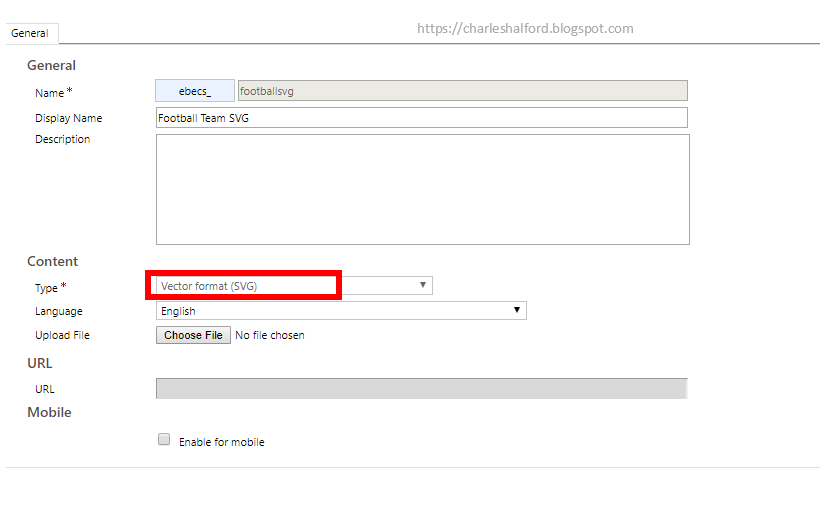
 Ensure your web resource is specified as an SVG, and remember to Save and Publish!


Once you publish your customisations and then navigate to a Unified Interface app, you will see the entity using the icon you've just added.


Arguably, it looks even better on mobile!


Tip: if you want change an icon for an area in the site map, such as the below.


You can do this in the Site Map Designer by opening the properties for the area and changing the icon (groups don't have icons).


Tuesday, 11 September 2018

Creating a Portal for Sub Contractor Time Entries in PSA

Last week I was lucky enough to attend a training course on Microsoft D365 Portals (from Iain, who makes up half of this blog https://www.msdynamicduo.com). Prior to this, my exposure to Portals had been pretty limited and the session really got me thinking about all of the different possibilities and scenarios that they could be used in. Another thing that surprised me is how a lot of the configuration is fairly straightforward and isn't beyond a functional consultant, although technical knowledge obviously helps. CSS skill would particularly help to make your Portal look a lot more suave and easy on the eye. 

When could Portals be used in PSA?
Currently, every project I am on incorporates Microsoft D365 for PSA in some shape or form. So this led me to think how we could use Portals in PSA. A few ideas that sprung to mind was for Invoicing or Project Time Approvals, Expense Approvals or Subcontractors submitting Time and Expense; just to name a few. 

My Sub Contractor Time Entry Portal
Now acquainted with Portals and their capabilities, I began to build a Portal that would allow Sub Contractors (who don't have a license to D365 and are Resources linked to Contact records) to go and submit Time Entries. I won't go into all of the finer details in terms of provisioning the details/set up of web pages, but you can find more info here - https://docs.microsoft.com/en-us/dynamics365/customer-engagement/portals/administer-manage-portal-dynamics-365 

My main aim was to be able to replicate the Submit & Recall functionality available in PSA on Time Entries, as well as making the interface as user-friendly as possible (with the least effort possible, so that it wouldn't repel users). 

First off, I edited my Home Web Page to brand it with the eBECS logo and added a Web Link Set so that users would be able to click through to Web Pages from the landing page.


I also created a Create Time Entry Web Page that was linked to my Entity Form for Time Entries, changing some of the Entity Form Metadata along the way so that Projects and Roles were drop down options rather than Lookups.


Adding Submit & Recall Time Entry Buttons
Then I created a new Web Page for My Time Entries and an Entity List for My Time Entries, and associated the two records. I also created four new views specific to my portal for:
  • My Draft Time Entries (entry status equals Draft)
  • My Submitted Time Entries (entry status equals Submitted)
  • My Approved Time Entries (entry status equals Approved)
  • My Rejected Time Entries (entry status equals Returned)
In order to show Time Entry records that related to my Contact record, I used parent/child Entity Permissions on Bookable Resource and Time Entry.


Next on my agenda was to create two on-demand workflows that replicated PSA functionality and changed a Submitted Time Entry back to Draft status through clicking RECALL and another workflow that would change a Time Entries status to Submitted by clicking SUBMIT, if it was in a Draft or Returned state.


Now I'd created my relevant workflows, I wanted to add them as a button against records in my Entity List. Underneath Grid Configuration on the Entity List form, I added both of my Workflows (Step 1 below) and changed the button labels (Step 2 below). Then I navigated to my filter settings so I could ensure that my RECALL button was only available for Submitted entries and SUBMIT was only available on my Draft and Returned entries. 


Adding Filter Criteria for my Workflows

Under Advanced Settings (Step 3 above), I changed the success message for each workflow as necessary and then applied Filter Criteria so the button would only appear on records that met my criteria. This was just FetchXML which I had built up through an Advanced Find. 


My Entity List In Practice
My Draft Entries only give the user an option to submit the entry - 


My Submitted Entries only give the user an option to recall an entry - 


My Approved Entries give me no options - 


My Rejected Entries only give the user the option to submit the entry again - 


Summary
In conclusion, without really going in and playing around too much with the UI and other Web Pages, I've managed to replicate the Submit & Recall Time Entry functionality in PSA. Sub Contractors wouldn't need a license to D365 nor would they be accessing D365 directly, so this solution is one that may appeal to numerous organisations.

Nice To Have

Another neat thing to do is add a Chart to your Web Page (instructions can be found here https://docs.microsoft.com/en-us/dynamics365/customer-engagement/portals/add-chart). I created a 'My Time Entries' for a weekly view that showed the hours per day and per project.


Tuesday, 28 August 2018

PSA - Reporting on Project Task Assignments

The other day I went to create a simple dashboard in Dynamics 365 for Project Service Automation (PSA) that could be used by resources to show them the Project Tasks they were assigned to. Typically, it wasn't as easy as I'd envisaged. Out of the Box (OOB) you have the Bookings and Tasks view for each user which gives a nice overview but the view is only available in weekly format and although there is the option to mark a task as completed, the functionality is fairly limited. This post gives some insight into my investigation and the entity you need to use, in order to report on the tasks a resource is assigned to.  


What is a Work Breakdown Structure?
First off, I feel it's necessary to give a bit of background around the WBS in PSA. The WBS is essentially your project plan where the project manager can create estimates of both costs to their own business and sales prices at task level. They can then track the progress against these tasks when time is submitted against the project, and task if applicable. As you can see from the below WBS, I have numerous tasks and I've assigned myself as a Resource against them. If you were to use the Microsoft Dynamics 365 PSA Add In for Project, your project plan would sychronise and link with your WBS (watch this space for a blog post around the Add In 😏).


Initial Investigation
So firstly, I navigated to Advanced Find and opened on of these individual Project Task records. 


As you can see from the below record, the Resources field is a free text field rather than a Lookup and it is blank. 


Odd right? So this caused me to dig a little deeper and I noticed against the Project Task record there was an associated record called Resource Assignments. 


At first glance, it doesn't look like much with two fields on the form.


However, when I added all columns to my advanced find, I found exactly what I was looking for.


After testing with a few different use cases such as changing a resource or adding multiple resources against a task, I was reassured that a Resource Assignment record is suitably created on every assignment and would work as for a user as a dashboard. As you can see from the below screenshot; John Smith and myself are assigned to one task and a record has been created for each. 


Dashboard & Views
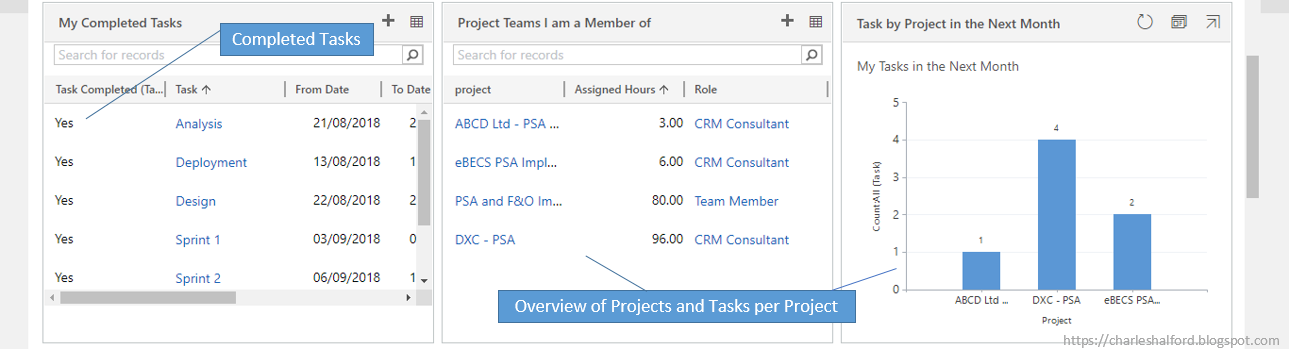
So now I've found the entity I need, I can go and create my dashboard. My first point of call is to create a couple of views that show tasks assigned to myself in the next month as seen below and how many I have assigned. I also created a few charts.


My Finished Article
So this dashboard is fairly basic but it gives you some food for thought on the types of things you could do. In addition to standard views and charts, I've also added a custom 'Task Completed' field to the Project Task form for resources to update. 


New Feature - Reconciliation View


Also, it's worth noting that there are some cool changes coming in the next version and one of these enables users to see the difference between their bookings and assignments, and reconcile the two so that their assignments match up with their bookings. More info on the Reconciliation View in V3 can be found here https://docs.microsoft.com/en-us/business-applications-release-notes/April18/dynamics365-project-service/reconciliation-view