


Integration Keys
Prior to running any projects, ensure you have integration keys against both the Account and Contact entities. You can do this by navigating to your Connection Set and opening the Integration Key tab as seen below. As I've installed the P2C solution, I'm using the out of the box (OOB) Account Number and Contact Number fields but you can add any fields you've manually created here too that act as keys.

Customers
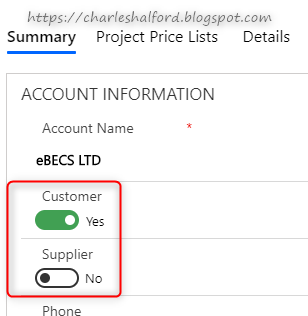
So the easiest to set up is Customers, as Microsoft have done the majority of work for you already. In order to make sure you only pass Accounts over to the appropriate data entity in FinOps, you'll need fields to capture the type of Account. You could use the out of the box (OOB) Relationship Type field in CE, but I've created two new fields in case an Account can be both a Customer and a Vendor.
Another customisation you will need to make in CE (unless you can default it in PowerQuery) is Sales Tax Group and Customer Group. As you can see below, I've created two option sets which will map across to the relevant fields in FinOps.

It is worth noting that for Currency I am mapping over to ISO codes in FinOps and I have also taken out the OOB tasks mapping Sites and Warehouses. Microsoft recommend defaulting these values, although it depends on whether you use either Sites or Warehouses in your FinOps implementation.
Once you have added the relevant fields to your Account form (you may need to add more depending on requirements), go to www.admin.powerapps.com and create a new Project. Select the below template 'Accounts (Sales to Fin and Ops) - Direct' and give your Project a suitable name that follows the same convention as your Connection Sets etc.

Then select your Connection Set, Organisation and click Create. You'll be redirected to your Project, which will contain one task.

If you open the task, you will see the pre-populated mappings -

You can add new mappings, and by clicking map type you can add transformations. Tip: although you can do all of these in Advanced Query, if you add all of your mappings here with it disabled and enable, it will automatically add all of your current transformations to your queries. Here you can set default values, truncate and map values. For instance, for certain fields where they don't exist in CE but you want to default them in FinOps, you can default them with a transformation.

Alternatively, you can map fields from an option set/free text field to values in FinOps. For instance, the below is mapping I mentioned earlier for the OOB Country/Region field in CE to ISO codes in FinOps.

To set up Customer Group and Sales Tax Group, you'll need to create new mappings.

You can then add your transformations so that certain option set values map to values in FinOps. You will need to grab the values from your fields in CE and the codes in FinOps.
 Then you can add your mappings (tip: ensure there are no commas or spaces in your values).

Now I have my mappings set up with the relevant transformations, I need to be able to run a query so only Accounts marked as Customers in CE are pulled into FinOps. In order to do this I need to enable Advanced Filtering. Tip: this cannot be undone and it will enable it for ALL tasks on your integration project. Also, if you have one field going mapping to two fields, you'll need to create a conditional column in your table for one as this will throw back errors.

Once enabled, open the Advanced Query and Filtering section. Tip: if you get errors here and are unable to see tables below, check both the URL and schema. Ensure that you have your custom fields in there and amend any schemas as necessary. Unfortunately it can very much be finding a needle in a haystack.

So now I have all my transformations, I need to filter to ensure only Customers are integrated. Go to the data section and locate your customer field. Right click the field, and filter on the values.

Insert the step and enter the filter criteria below.

Tip: double check that your rows have been filtered afterwards and only the data that meets your criteria is now picked up.

Vendors
For Vendors I created a new task with the below entities on my existing Project.

Most of the tasks are the same as Customers, although there are different fields you will need to use. Rather than Customer Group, you will need to map to Vendor Group instead. I've created a Vendor Group option set field that uses Business Rules to make it mandatory and visible when Supplier=Yes.

Other key fields that aren't included in the Customers task you need to map to include the following -
Contacts
Contacts is relatively simple and you could always create a new Project and use a template. However, for Contacts I created a new task with the below entities so I can keep my Accounts and Contact integrations all in one Project. Then I know that they will sequentially run and any when any new Contacts are mapped across, the Account should have been integrated already too.

Below are just a few of the fields you can map, but Associated Party Number (associated Account Number in CE) and Contact Person Party Number (Contact Number in CE) are two that MUST be mapped along with First Name, Last Name etc.

Run Project
Now I've set my Project up, I can run it.

After running (you can run it with all data for migration purposes), you will be redirected to Execution History. If you open this (give it some time), it will go and pick up any records that meet your criteria that have yet to be integrated.

It will look at the Modified On field in CE and if there are changes, you will get upserts against tasks which could either be new records created or updates to existing records. Tip: in Finance & Operations, the Data Management section under Workspace will give you more information about your import https://docs.microsoft.com/en-us/dynamics365/unified-operations/dev-itpro/data-entities/configuration-data-projects?toc=/fin-and-ops/toc.json. It provides you with an import log and the error messages are much more rich in information. You can see whether something made it into staging and if a field not being populated was the reason something failed.
After a few refreshes, there we have it - success! At least each task has created or updated a new record in FinOps. As you can see, there is a warning on my Vendors task, so I can either click into the Task's execution history or check FinOps to see what the error was.

Tip: once you're happy with your Projects, it's always useful to save them as Templates, in case you want to use them in the future or to add them to new mappings between Business Units and Companies.

Tip: it's always worth setting up email alerts for any warnings or failures. You can do this under the Scheduling section of your Project.

Another customisation you will need to make in CE (unless you can default it in PowerQuery) is Sales Tax Group and Customer Group. As you can see below, I've created two option sets which will map across to the relevant fields in FinOps.
It is worth noting that for Currency I am mapping over to ISO codes in FinOps and I have also taken out the OOB tasks mapping Sites and Warehouses. Microsoft recommend defaulting these values, although it depends on whether you use either Sites or Warehouses in your FinOps implementation.
Once you have added the relevant fields to your Account form (you may need to add more depending on requirements), go to www.admin.powerapps.com and create a new Project. Select the below template 'Accounts (Sales to Fin and Ops) - Direct' and give your Project a suitable name that follows the same convention as your Connection Sets etc.


If you open the task, you will see the pre-populated mappings -

You can add new mappings, and by clicking map type you can add transformations. Tip: although you can do all of these in Advanced Query, if you add all of your mappings here with it disabled and enable, it will automatically add all of your current transformations to your queries. Here you can set default values, truncate and map values. For instance, for certain fields where they don't exist in CE but you want to default them in FinOps, you can default them with a transformation.

Alternatively, you can map fields from an option set/free text field to values in FinOps. For instance, the below is mapping I mentioned earlier for the OOB Country/Region field in CE to ISO codes in FinOps.

To set up Customer Group and Sales Tax Group, you'll need to create new mappings.

You can then add your transformations so that certain option set values map to values in FinOps. You will need to grab the values from your fields in CE and the codes in FinOps.


Now I have my mappings set up with the relevant transformations, I need to be able to run a query so only Accounts marked as Customers in CE are pulled into FinOps. In order to do this I need to enable Advanced Filtering. Tip: this cannot be undone and it will enable it for ALL tasks on your integration project. Also, if you have one field going mapping to two fields, you'll need to create a conditional column in your table for one as this will throw back errors.

Once enabled, open the Advanced Query and Filtering section. Tip: if you get errors here and are unable to see tables below, check both the URL and schema. Ensure that you have your custom fields in there and amend any schemas as necessary. Unfortunately it can very much be finding a needle in a haystack.

So now I have all my transformations, I need to filter to ensure only Customers are integrated. Go to the data section and locate your customer field. Right click the field, and filter on the values.

Insert the step and enter the filter criteria below.
Tip: double check that your rows have been filtered afterwards and only the data that meets your criteria is now picked up.

Vendors
For Vendors I created a new task with the below entities on my existing Project.

Most of the tasks are the same as Customers, although there are different fields you will need to use. Rather than Customer Group, you will need to map to Vendor Group instead. I've created a Vendor Group option set field that uses Business Rules to make it mandatory and visible when Supplier=Yes.

Other key fields that aren't included in the Customers task you need to map to include the following -
- Vendor Party Type
- Vendor Party Number
- Vendor Organisation Name
- Vendor Account Number
Contacts
Contacts is relatively simple and you could always create a new Project and use a template. However, for Contacts I created a new task with the below entities so I can keep my Accounts and Contact integrations all in one Project. Then I know that they will sequentially run and any when any new Contacts are mapped across, the Account should have been integrated already too.

Below are just a few of the fields you can map, but Associated Party Number (associated Account Number in CE) and Contact Person Party Number (Contact Number in CE) are two that MUST be mapped along with First Name, Last Name etc.

Run Project
Now I've set my Project up, I can run it.

After running (you can run it with all data for migration purposes), you will be redirected to Execution History. If you open this (give it some time), it will go and pick up any records that meet your criteria that have yet to be integrated.
It will look at the Modified On field in CE and if there are changes, you will get upserts against tasks which could either be new records created or updates to existing records. Tip: in Finance & Operations, the Data Management section under Workspace will give you more information about your import https://docs.microsoft.com/en-us/dynamics365/unified-operations/dev-itpro/data-entities/configuration-data-projects?toc=/fin-and-ops/toc.json. It provides you with an import log and the error messages are much more rich in information. You can see whether something made it into staging and if a field not being populated was the reason something failed.
After a few refreshes, there we have it - success! At least each task has created or updated a new record in FinOps. As you can see, there is a warning on my Vendors task, so I can either click into the Task's execution history or check FinOps to see what the error was.

Tip: once you're happy with your Projects, it's always useful to save them as Templates, in case you want to use them in the future or to add them to new mappings between Business Units and Companies.

Tip: it's always worth setting up email alerts for any warnings or failures. You can do this under the Scheduling section of your Project.

No comments:
Post a Comment